March 29, 2019 ☼ python ☼ deeplearning ☼ programming
“no-nonsense guide to installing python for deep learning.”
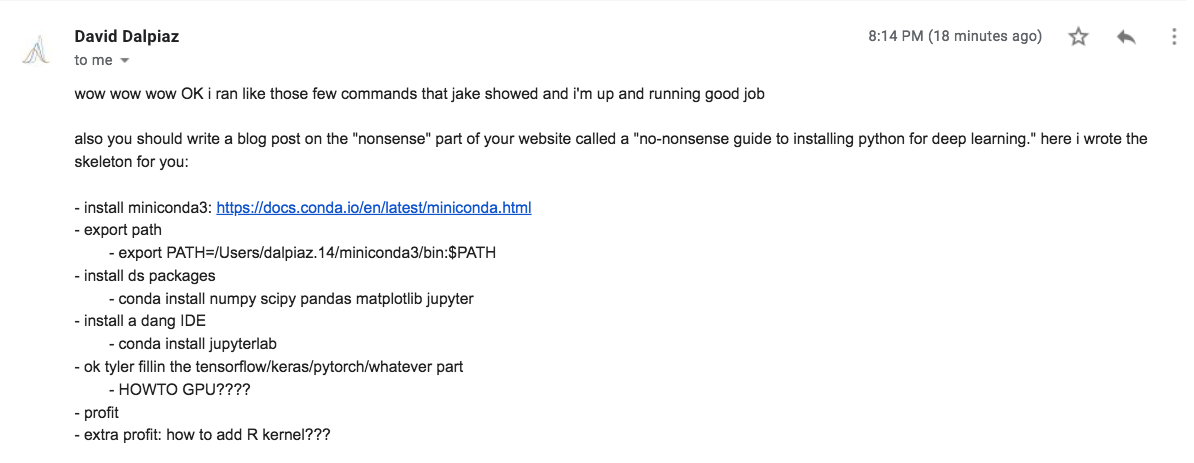
So I didn’t mean this blog to cover anything technical, well I still don’t want to. But after helping my old friend/colleague/professor David Dalpiaz with his python environment for his upcoming projects, he inspired me to write upon this.
He even wrote me an outline!
The goal of this post is to help you set up a stable development environment for a deep learning project. Configuring a stable Python environments for different projects can be difficult, so hopefully people (perhaps the readers of Dave’s upcoming books) will find this useful. Stop that .sudo pip
Before we begin, this video (starting @15:45) will give you a good idea of what we are about to do (also the “jake” in Dave’s email is Jake Vanderplas in the video).
1. Install Miniconda
Please please please download the Python 3.7 version for your machine! Python 2.7 will not be maintained after January 1st, 2020, and many of Python’s scientific libraries have already dropped the 2.7 support (and Python 3.6+ is as stable/fast as 2.7)!
You can see the detailed instruction guide here.
Installing miniconda will bootstrap conda, the package manager, and will set up a conda environment on your machine. This will ensure you and your peers will have the same python environment regardless of the operating systems. Using conda will also make it easier to reproduce other’s work when executing the same code as you can simply modify your python environment or create another one to duplicate other’s environment. Furthermore, conda environment comes with its’ own (anaconda) python executable, so it will not interfere (and break) with your system python and libraries.
2. Export Path
export PATH="/Users/dalpiaz.14/miniconda3/bin:$PATH"Installing conda using the official installer will add miniconda path to your .bash_profile or .bashrc. Even then you might have to re-source them or might have to restart your terminal.
If you are using zsh or other shells, the installer will not automatically export/add the path to your dotfile(s). The easiest way to append export path for your shell (e.g. zsh) is to copy pasta what’s appended at the end of your .bash_profile to your .zshrc, then re-source/restart your terminal.
You can run the following command to see if you have properly installed conda:
$ conda info

     active environment : None
       user config file : /Users/tyler/.condarc
 populated config files : /Users/tyler/miniconda3/.condarc
                          /Users/tyler/.condarc
          conda version : 4.6.0b1
    conda-build version : not installed
         python version : 3.6.4.final.0
       base environment : /Users/tyler/miniconda3  (writable)
           channel URLs : https://conda.anaconda.org/conda-canary/osx-64
                          https://conda.anaconda.org/conda-canary/noarch
                          https://conda.anaconda.org/conda-forge/osx-64
                          https://conda.anaconda.org/conda-forge/noarch
                          https://repo.anaconda.com/pkgs/main/osx-64
                          https://repo.anaconda.com/pkgs/main/noarch
                          https://repo.anaconda.com/pkgs/free/osx-64
                          https://repo.anaconda.com/pkgs/free/noarch
                          https://repo.anaconda.com/pkgs/r/osx-64
                          https://repo.anaconda.com/pkgs/r/noarch
          package cache : /Users/tyler/miniconda3/pkgs
                          /Users/tyler/.conda/pkgs
       envs directories : /Users/tyler/miniconda3/envs
                          /Users/tyler/.conda/envs
               platform : osx-64
             user-agent : conda/4.6.0b1 requests/2.20.0 CPython/3.6.4 Darwin/17.0.0 OSX/10.13
                UID:GID : 504:20
             netrc file : /Users/tyler/.netrc
           offline mode : False
3. Install DS Packages
$ conda install numpy scipy pandas matplotlib jupyterConda-installed numpy (packaged by Anaconda Inc.) is packaged with Intel’s mkl library, which significantly speeds up math operations if your machine is powered by Intel CPUs (which is likely). You get better performance than using just pip-installed numpy.
4. Install a dang IDE
$ conda install jupyterlabJupyterLab is a scaled up version of Jupyter Notebook, a powerful tool/IDE that can run your code interactively. It makes it painless to share your scientific code/work/visualizations with your peers through the .ipynb file.
5. ok tyler fillin the tensorflow/keras/pytorch/wahtever part
I have no idea what he meant by this. If you’d like to use popular machine learning/deep learning frameworks, you can do so by installing them through conda. I am not sure which framework Dave will use, but I’ll list the obvious two. PyTorch and TensorFlow are currently the two most popular ML/DL framework out there, actively being developed by Facebook and Google respectively. There are countless articles and blog posts on comparing the two, so I won’t cover them.
$ conda install pytorch torchvision -c pytorch$ conda install -c conda-forge tensorflow TensorFlow’s main API now includes Keras. So there is no need to install Keras separately anymore as you can use them via TensforFlow.
how to GPU
GPUs can significantly speed up your model training process because GPUs are black magic better at linear algebra operations than CPUs and can run processes in parallel. If you have a GPU in your machine and want to utilize your GPU, you must first install a GPU driver. If you have been gaming or know how they work you probably have a driver installed already. If not, you can download and install them from here.
For TensorFlow, you have to explicitly install a GPU version of the TF library:
$ conda install -c anaconda tensorflow-gpu Afterward, you can run the following code to check if TensorFlow can access a GPU.
tf.test.is_gpu_available(
    cuda_only=False,
    min_cuda_compute_capability=None
)
More on here.
For PyTorch, for instance, if you are running linux with the most recent GPU driver, and want to speed up your PyTorch projects, you can install cudatoolkit via conda:
$ conda install pytorch torchvision cudatoolkit=10.0 -c pytorchThere are more installations options based on your machine available on the PyTorch website.
If the output of running the following segment of code is 0, you have succesfully connected your GPU to your kernel.
import torch
torch.cuda.current_device()
You can follow this PyTorch documentation to fully utilize your GPU for PyTorch.
After installing cuda toolkit and/or GPU versions of libraries, you might have to restart your jupyter kernels. Now, you can use GPUs to speed up your training process!
Note: NVIDIA is pretty much the only option for utilizing GPUs for ML/DL. If your machine is powered by AMD (sad if you just paid $$$ for your shiny new MacBookPro), you might want to find an alternative resources to run your code. There are ways to run your code on AMD GPUs but it might take some effort to get it to work as you wish.
Google Colab is an amazing service that lets you use jupyter-like interface for computing and currently, it provides a free GPU! You can simply create a new Python 3 notebook or import (and export) your work with .ipynb files.
If you’d like to take advantage of the free GPU click on Edit > Notebook Settings > Hardware accelerator and choose GPU. Now you have a GPU-enabled Jupyter Notebook running on the cloud!
Also, if you are familiar with docker, there are plenty of ready-to-deeplearning docker images available online. Like this. You can run those on your local machine as they provide clean and contained environment for your projects. The GPU-compatible docker images would let you utilize the GPU from the container if you have a GPU and the properly installed driver on your machine.
Give it a try!
profit
Should I put ads on this page and set up a patreon account?
extra profit: how to add R kernel???
I’m sorry Dave, I’m afraid I can’t do that.
It’s time to move on.
On a more serious note, Jupyter is a loose acronym for JUlia - PYthon - (e) - R. So Jupyter can easily adapt R kernels, which can be done by installing IRKernel.
Disclaimer: I was previously employed by Anaconda Inc. and NVIDIA Corp.. I might be biased, but I truly think this is the best way to do it.
Meta: This is my first public technical writing with memes sprinkled. How did it do? I welcome constructive feedback. Send me an email: iam [@] tyler.kim
P.s. Special thanks to Dave for encouraging me to put this out in the public.